top of page
Search


TL;DR

All 3D parts are now printed and fit properly. The Jetson housing properly fits and all the camera mounts fit as expected. The button press enables us to switch between the rear view and side view cameras.


What's New

All the parts we need for assembly are done now! As mentioned before, we had to make some changes to our CAD parts because some fits were a little too tight and also because we added an extra button to our design. COVID also makes handing off parts to group members more inconvenient than we'd like. BUT, we're all done now and the parts look great!


From the images above, we show the Jetson housing, the rear view camera mount, and the side mirror camera mount respectively. (We've removed the mirror from the side mirror to install the mount).


During all of this, we've been running tests on the software side of our project and are in the process of setting up a real-life test setting. We plan to get some real-life footage to test the machine learning detection before hooking it up to the vehicle.


What's Next

Software testing. Lots of software testing. Safety is priority here and we need to make sure our code is robust and works well. We'll be trying to test the software in real-life scenarios and optimizing as we need to.


TL;DR

Confirmed, we have power the system as intended. Push button to switch between blind-spot or rear-view also installed.


What Happened

A few posts ago, we told of some issues we were having in terms of powering our system. Essentially, our initial solution didn't work as intended and we couldn't supply the Jetson nano with enough power - causing it to brown out. This has now been resolved.


Our Amazon packages all finally came in and a quick hook up to all our cameras + computer + external monitor shows it all working. The wiring is shown in the image above. This will, of course, be cleaned up in a nice housing but the main thing to see is that the screen is ON and the camera is RUNNING.


Our new solution provides the needed power to ensure everything is working smoothly and as intended.


More

In addition to this, we've also installed a push button to switch between the rear-view and blind-spot view cameras. At the moment, our only footage of this is the cameras recording a ceiling so look forward to an actual demo of this coming shortly :)


What's Next

Next is construction. It's time to put it all together.


TL;DR

We are now capable of reading in and detecting objects in both blind spots and the rear-view camera at 25 FPS @ 480p.


Big Software Steps

Cameras

Improved FPS

ML Detection


Our software is just about done! Our blind spot camera feeds can swap to our rear-view feed smoothly. We're also hitting a respectable 25 FPS @ 720p on our dual blind spot camera feeds. This is with the ML model running so we can expect this to be our final FPS unless we decide to overclock or, if time permits, further optimize the model.


We've also reduced the model's responsibilities. Originally, it was detecting over 90 different objects - including chairs, bottles, and phones. We don't really need to detect these things while driving so we've cut the model down to only detect 5 key objects:


- Cars

- Trucks

- Pedestrians

- Bikes

- Busses


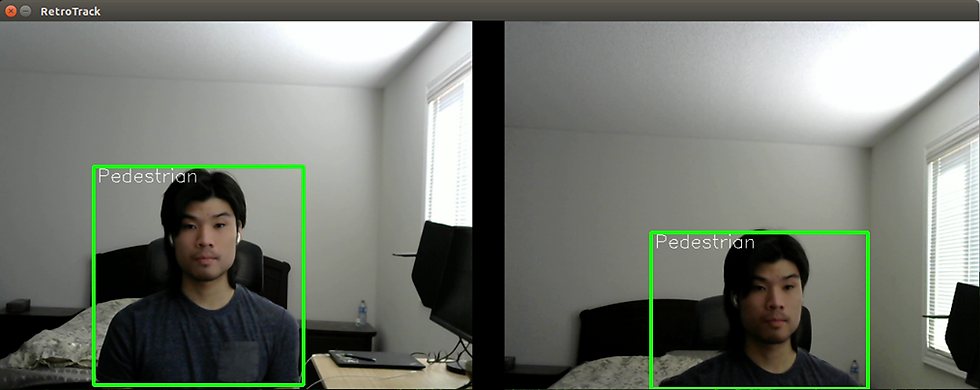
In the demo picture above, we show our dual cameras running simultaneously and feeding the feed into the model which detects our team member, Justin, as a pedestrian correctly.


What's Next?

We're looking to add a button to trigger the switch between rear-view and blind spot view as well as making some slight modifications to the 3D printed housings to better fit our parts.

bottom of page